
John Pretola of Woronoco Custom Fly Rods has continued to work on the 7'6" four weight Lamiglas build that he is completing to be a part of the T.F.M. Fly Rod Loan Program and sent this detailed series of photographs and narrative of how he built the cork grip for this fly rod.
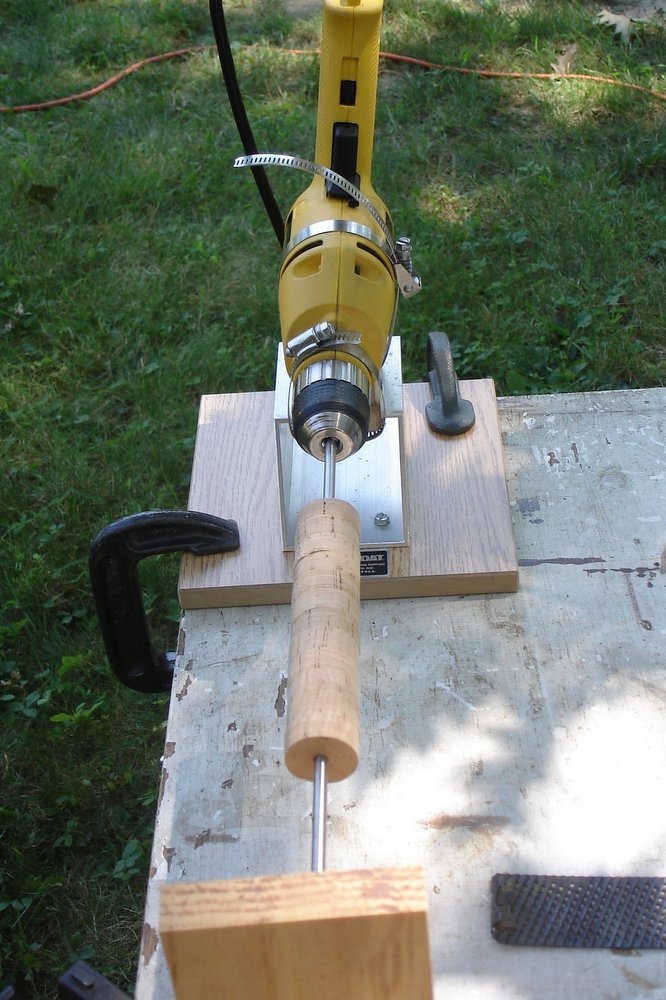
This is my set-up (and take down) cork lathe. I do the work outside to prevent all that dust from getting dispersed through the house. My lathe is a modified Flex Coat drill lathe. When I turn grips on the blank, I use the full Flex Coat set-up with the two wheeled stands.
Lately, I have been turning grips on a separate mandrel and that is when I use the set-up in the picture. In the picture you see the 6" grip blank mounted on a long shank drill bit that rests in a home-made wooden stand. I put a large flap of masking tape over the drill blades as a safety measure and hands-off reminder.

I use a surform blade to do the initial cork and glue run-out leveling. Other important items you see include a cheap caliper set with scales in both inches and millimeters. We don't need to ruin an expensive caliper set with cork dust and the increased precision is not necessary. I also set out a full-scale drawing of the desired finished grip with dimensions in both inches and millimeters so I can use either scale.

The surform takes the grip blank down leaving a rough surface and a lot of sawdust. Notice I am observing proper safety for working with a lathe by not wearing rings, exposed shirt cuffs, etc.

At this point, the grip blank measures about 1 1/8" in diameter.

I then use #60 coarse grit sandpaper as well as a straight edged block to true-up the cork and ensure the grip blank is symmetrical.

This illustrates the initial shaping of the grip contours using hand-held coarse sand paper like you would use in sanding any project on a wood lathe.

Careful measurement of the contours pays off here. I try to bring the grip to 1/8," or slightly less, of the desired contours with the coarse sand paper.

Now I have switched to #100 medium sand paper and used it to bring the contours to within 1/16" of the desired finished grip dimensions.


Finally, I change to #400 wet or dry sand paper to polish the cork and bring the grip to final dimensions.

This is the finished grip ready to be reamed and glued to the rod blank. More on this build as all the pieces come together.
Check out the Woronoco Custom Fly Rods website for more information and examples of John's work.
2 comments:
That is pretty dang cool! Thanks for the step by step, this looks like something I could get into.
This is definitely something I'm going to do for my next build. I've done this setup to shape a rear spey grip. I like the idea of using a steel mandrel.
Thanks for that.
Post a Comment