
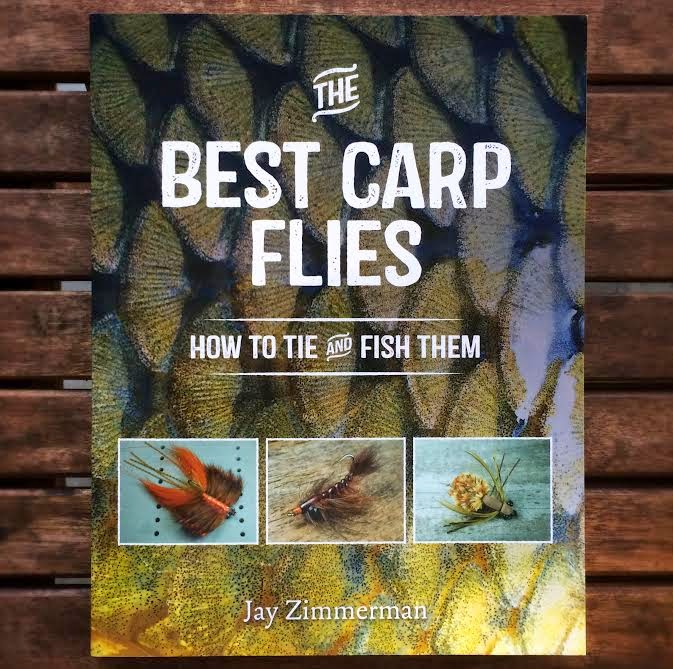
(Jay Zimmerman's latest book, The Best Carp Flies - How To Tie And Fish Them, was released last week and he was gracious to provide a chapter from the book with a condensed version on how to tie his effective carp pattern, the Backstabber. Enjoy...and then go buy this book.)
I created the Backstabber carp fly almost by accident. In 2005 I was still fairly new to Colorado and the fly-fishing industry. For the first time in my life, I was surrounded by other fly fishermen, other serious fly tiers...but most importantly, surrounded by heaps and heaps of hooks and hackle and every other imaginable type of fly tying material. I was able to get my hands on a good fly tying vise and other tools, as well, and this created the perfect storm of creativity in my own tying.
I was fishing for and designing new flies for just about every fish species in Colorado—high alpine cutthroat, small stream brookies, tailwater rainbows, brown trout in the city limits, grayling, northern pike, walleye, wiper, smallmouth bass, largemouth bass, crappie, perch...you name it. But it was the carp that had my heart, and I was endlessly fussing with new, or better, or simpler flies that they would readily eat. One evening that summer I was at home in my studio apartment in Boulder working on a batch of big, articulated bass streamers when I had a tier’s epiphany. I was stage tying the bass flies, so I had a cup full of the rear hooks on which I had lashed marabou. These smaller hooks were to serve as the tail, attached with wire, to a larger front hook that was going to have all sorts of colored schlappen and spun deer hair. On some of these hooks I had tied lead dumbbell eyes to the hook shank in the hopes they would make the hook ride upside down. My thinking was to have a big, articulated bass fly with the front hook clipped off and the rear hook riding point up to avoid snagging and picking up moss and what not. This bass fly never really got too far out of its evolutionary infancy, but it inadvertently spawned the best carp fly I have ever tied. I procrastinated long enough and stared at that cup of unfinished bass flies and...know? Those would make dang good carp flies!
I tied some smaller versions, added some dubbing and soft hackle, and tried them on the mudflats the next morning—and they worked. They worked so well that I tied dozens more the next day in varying colors and sizes. The fly was simple and fast to tie and I was on the water at least a couple hours every day, so the fine-tuning of the pattern did not take that long. Over the next three years, the Backstabber became my go-to carp fly and I used it to land hundreds...thousands of fish. I was tying custom orders of the fly for other local anglers, and friends were tying their own variations of the pattern for their own carp fishing.
The Backstabber became my trademark of sorts and spread in popularity throughout Colorado. It was new and designed specifically for carp at a time when fly-fishing for carp was finally gaining some serious traction among anglers in the state. During those years I tweaked and perfected the fly even more, settling on the hook, the Gamakatsu SL45, and the correct weight and the best size and the best color schemes. The SL45 hook was intended to be a bonefish hook, so it is no wonder it lends itself well as a carp fly—they are similar pursuits.
I originally tied the Backstabber on a few other makes and models of hook, but settled on this one because it fit the style of fly perfectly, and was sharp and sturdy, and I liked that it was black in color. I would tie it in four different sizes, as large as a size 4 and as small as a size 10. However, it soon became apparent that the size 6 with a delicate cast was just as effective on spooky fish as a size 10 and a size 4 was sometimes too big—so most of the time I was starting the day with a size 6. The weight of the fly became a point of serious attention for a time, as well. I needed some weight on the hook shank to ensure the fly rode hook point up, and to make it sink, but too much weight would make the fly plop too loudly on the surface of a calm mud flat and spook every carp in the vicinity. It was a fine balance, and a small-sized brass dumbbell was the answer.
Choosing the right color combinations for the Backstabber carp fly took a little longer. Every lake, river, or reservoir has carp that act differently and have different tastes in flies. I found that an olive colored Backstabber worked best for the large, spooky carp in clear, well-foliaged waters and the black-colored one was ideal for muddy water (mainly because it is easier for me to see!) and the wine-colored one, for whatever reason, seems to work best in the early season when the water is still cold. The gray minnow Backstabber became my late season go-to, when the water levels in my local reservoirs dropped low enough to pull the carp out from the food-rich cattail beds and coves and they are forced to chase shad. The rust-colored version came about per request from friends. This is the color I fish the least, but seems to be the most popular, maybe because it is a commonly accepted “carpy” color?
Sometime in the summer of 2008 I got a call from Brian Schmidt at Umpqua Feather Merchants. Brian informed me that they wanted to include the Backstabber in their 2009 wholesale catalog and sign me as a signature fly designer. This would allow me to collect royalties from a fly pattern, expose my carp fly to the rest of the world, and open the door for me to market many of the other fly designs I had been working on. Since then the Backstabber has been sold in almost every fly shop in every state across the country and has been called a “standard” and “a benchmark, like the Woolly Bugger and Adams are for trout.” And my personal favorite, “as ubiquitous as the Clouser Minnow”. But most importantly, this fly has helped others be successful on their own carp waters and has influenced a new generation of carp flies...which is truly the greatest honor any fly tier can aspire to.
BACKSTABBER - BLACK
Hook: #6 Gamakatsu SL45
Thread: Black 6/0 UNI-Thread
Weight: 1/8" Black Dazl-Eyes
Body: Hellgrammite Dave Whitlock SLF Dubbing
Wing: Black Marabou
Hackle: Olive India Hen Back
Cement: Hard as Hull

1. Begin the thread wraps immediately behind the hook eye and wrap a dense thread base all the way back to the rear of the hook shank. Mount the Dazl-Eyes onto the top and in the middle of the hook shank. A small drop of Zap-A-Gap over the tie down will make everything even sturdier and less likely to rotate on the hook shank—this is important, because this fly needs the weight to always be on the top of the shank in order to flip the hook and make it ride hook point up.

2. Wrap the thread to the rear of the thread base and create a short thread loop. Wrap the thread forward and let the bobbin hang in front of the Dazl-Eyes. Fill the thread loop with dubbing. Keep the dubbing sparse and avoid any dense clumps. A small amount of dubbing wax applied to the thread beforehand can help keep the dubbing in place while you are filling the loop.

3. Twist the dubbing loop by rolling it between your thumb and middle finger, then switching hands and continuing to twist. Stop once the dubbing rope is thin and tight. Keep the dubbing rope pulled tight and brush lose all the long dubbing fibers using a dubbing brush. It is important that you brush out the dubbing before you begin wrapping it onto the hook shank, as you want it to be as bushy as possible—hence the use of long-fibered dubbing and a dubbing loop.

4. Wrap the dubbing rope forward on the hook shank. Once you have reached the Dazl-Eyes, wrap the dubbing rope around the eyes in a figure eight pattern, being sure to cover any exposed thread either on the hook shank or at the tiedown point of the Dazl-Eyes. Make one turn of the dubbing rope on the forward side of the Dazl-Eyes and then tie it off — this should be about the end of the dubbed section of the dubbing rope. Trim the excess thread.

5. Crop the long-fibered dubbing short on just the top of the body. This will be the bottom of the fly once it is finished and flipped over to the hook-point-up position. Trimming the dubbing off this part of the fly will aid in counterbalancing the weight of the bent part of the hook by adding mass to the top of the finished fly and minimizing mass to the eventual bottom of the fly. The remaining long dubbing fibers will also keep the marabou “wing” of the Backstabber up and off the hook shank.

6. Select two marabou feathers from a strung clump. For the Backstabber carp fly I prefer marabou with long, fine feather fibers over one with short, fluffy fibers. Wet the first marabou feather and slick it back to form a slim shape. This enables you to see exactly how long the feather is and to have more control over it. Grasp the butt end of the feather between the thumb and ring finger of your non-tying hand and use the index and middle fingers of that same hand to straighten out the feather—which enables you to cut the feather to length with your free hand. You will not drop the end section (that you will be using) because it is secure. The usable piece of damp marabou should be about 3 inches (8 cm) long.

7. If you are tying on a rotary vise, rotate the vise so that the fly is hook point up. If not, remove the hook from the jaws, turn the fly over and re-clamp. Lay the prepared length of marabou off to the far side of the hook bend and tie it down right at the point where the dubbed body ends. The damp marabou should extend about 3/4 inch (19 mm) out past the bend of the hook, making the overall fly an inch and a half long.

8. Prepare the second piece of marabou in the same way you did the first. Lay this piece down on the near side of the hook bend. This insures there is an equal amount of marabou on either side of the hook, and that the hook can easily protrude through the marabou. Trim the butt ends of both pieces of marabou.

9. Select a feather from an India hen neck. Choose a feather that has fibers protruding out to about a ½ inch (13 mm) from the quill and straight fibers covering about an inch (25 mm) of the tip end of the feather. Prepare the soft hackle feather by cutting it to about an inch and a half (38 mm) long and stripping the butt end, leaving nothing but exposed quill. Be sure to leave a little bit of the fluffy webbing at the base of the feather—as this will add a bit more motion and liveliness to the finished fly. Tie the India hen feather down by the stripped quill. Be sure to have the cupped, or underside of the feather facing the rear of the fly—this allows the soft feather fibers to lie more easily back onto the body of the fly.

10. Wrap the soft hackle in place and tie off. Because the feather is short, it may only take three turns. Carefully trim the end of the feather with the tip of your scissors. Build a small thread head. End with a whip-finish knot and cut the thread. Apply a liberal amount of head cement to add durability to the fly.

This well done book provides tying instructions for over twenty essential carp patterns and includes variations of each pattern as well.
The Best Carp Flies is available through Amazon and your favorite carp friendly fly shop.
I created the Backstabber carp fly almost by accident. In 2005 I was still fairly new to Colorado and the fly-fishing industry. For the first time in my life, I was surrounded by other fly fishermen, other serious fly tiers...but most importantly, surrounded by heaps and heaps of hooks and hackle and every other imaginable type of fly tying material. I was able to get my hands on a good fly tying vise and other tools, as well, and this created the perfect storm of creativity in my own tying.
I was fishing for and designing new flies for just about every fish species in Colorado—high alpine cutthroat, small stream brookies, tailwater rainbows, brown trout in the city limits, grayling, northern pike, walleye, wiper, smallmouth bass, largemouth bass, crappie, perch...you name it. But it was the carp that had my heart, and I was endlessly fussing with new, or better, or simpler flies that they would readily eat. One evening that summer I was at home in my studio apartment in Boulder working on a batch of big, articulated bass streamers when I had a tier’s epiphany. I was stage tying the bass flies, so I had a cup full of the rear hooks on which I had lashed marabou. These smaller hooks were to serve as the tail, attached with wire, to a larger front hook that was going to have all sorts of colored schlappen and spun deer hair. On some of these hooks I had tied lead dumbbell eyes to the hook shank in the hopes they would make the hook ride upside down. My thinking was to have a big, articulated bass fly with the front hook clipped off and the rear hook riding point up to avoid snagging and picking up moss and what not. This bass fly never really got too far out of its evolutionary infancy, but it inadvertently spawned the best carp fly I have ever tied. I procrastinated long enough and stared at that cup of unfinished bass flies and...know? Those would make dang good carp flies!
I tied some smaller versions, added some dubbing and soft hackle, and tried them on the mudflats the next morning—and they worked. They worked so well that I tied dozens more the next day in varying colors and sizes. The fly was simple and fast to tie and I was on the water at least a couple hours every day, so the fine-tuning of the pattern did not take that long. Over the next three years, the Backstabber became my go-to carp fly and I used it to land hundreds...thousands of fish. I was tying custom orders of the fly for other local anglers, and friends were tying their own variations of the pattern for their own carp fishing.
The Backstabber became my trademark of sorts and spread in popularity throughout Colorado. It was new and designed specifically for carp at a time when fly-fishing for carp was finally gaining some serious traction among anglers in the state. During those years I tweaked and perfected the fly even more, settling on the hook, the Gamakatsu SL45, and the correct weight and the best size and the best color schemes. The SL45 hook was intended to be a bonefish hook, so it is no wonder it lends itself well as a carp fly—they are similar pursuits.
I originally tied the Backstabber on a few other makes and models of hook, but settled on this one because it fit the style of fly perfectly, and was sharp and sturdy, and I liked that it was black in color. I would tie it in four different sizes, as large as a size 4 and as small as a size 10. However, it soon became apparent that the size 6 with a delicate cast was just as effective on spooky fish as a size 10 and a size 4 was sometimes too big—so most of the time I was starting the day with a size 6. The weight of the fly became a point of serious attention for a time, as well. I needed some weight on the hook shank to ensure the fly rode hook point up, and to make it sink, but too much weight would make the fly plop too loudly on the surface of a calm mud flat and spook every carp in the vicinity. It was a fine balance, and a small-sized brass dumbbell was the answer.
Choosing the right color combinations for the Backstabber carp fly took a little longer. Every lake, river, or reservoir has carp that act differently and have different tastes in flies. I found that an olive colored Backstabber worked best for the large, spooky carp in clear, well-foliaged waters and the black-colored one was ideal for muddy water (mainly because it is easier for me to see!) and the wine-colored one, for whatever reason, seems to work best in the early season when the water is still cold. The gray minnow Backstabber became my late season go-to, when the water levels in my local reservoirs dropped low enough to pull the carp out from the food-rich cattail beds and coves and they are forced to chase shad. The rust-colored version came about per request from friends. This is the color I fish the least, but seems to be the most popular, maybe because it is a commonly accepted “carpy” color?
Sometime in the summer of 2008 I got a call from Brian Schmidt at Umpqua Feather Merchants. Brian informed me that they wanted to include the Backstabber in their 2009 wholesale catalog and sign me as a signature fly designer. This would allow me to collect royalties from a fly pattern, expose my carp fly to the rest of the world, and open the door for me to market many of the other fly designs I had been working on. Since then the Backstabber has been sold in almost every fly shop in every state across the country and has been called a “standard” and “a benchmark, like the Woolly Bugger and Adams are for trout.” And my personal favorite, “as ubiquitous as the Clouser Minnow”. But most importantly, this fly has helped others be successful on their own carp waters and has influenced a new generation of carp flies...which is truly the greatest honor any fly tier can aspire to.
BACKSTABBER - BLACK
Hook: #6 Gamakatsu SL45
Thread: Black 6/0 UNI-Thread
Weight: 1/8" Black Dazl-Eyes
Body: Hellgrammite Dave Whitlock SLF Dubbing
Wing: Black Marabou
Hackle: Olive India Hen Back
Cement: Hard as Hull
1. Begin the thread wraps immediately behind the hook eye and wrap a dense thread base all the way back to the rear of the hook shank. Mount the Dazl-Eyes onto the top and in the middle of the hook shank. A small drop of Zap-A-Gap over the tie down will make everything even sturdier and less likely to rotate on the hook shank—this is important, because this fly needs the weight to always be on the top of the shank in order to flip the hook and make it ride hook point up.
2. Wrap the thread to the rear of the thread base and create a short thread loop. Wrap the thread forward and let the bobbin hang in front of the Dazl-Eyes. Fill the thread loop with dubbing. Keep the dubbing sparse and avoid any dense clumps. A small amount of dubbing wax applied to the thread beforehand can help keep the dubbing in place while you are filling the loop.
3. Twist the dubbing loop by rolling it between your thumb and middle finger, then switching hands and continuing to twist. Stop once the dubbing rope is thin and tight. Keep the dubbing rope pulled tight and brush lose all the long dubbing fibers using a dubbing brush. It is important that you brush out the dubbing before you begin wrapping it onto the hook shank, as you want it to be as bushy as possible—hence the use of long-fibered dubbing and a dubbing loop.
4. Wrap the dubbing rope forward on the hook shank. Once you have reached the Dazl-Eyes, wrap the dubbing rope around the eyes in a figure eight pattern, being sure to cover any exposed thread either on the hook shank or at the tiedown point of the Dazl-Eyes. Make one turn of the dubbing rope on the forward side of the Dazl-Eyes and then tie it off — this should be about the end of the dubbed section of the dubbing rope. Trim the excess thread.
5. Crop the long-fibered dubbing short on just the top of the body. This will be the bottom of the fly once it is finished and flipped over to the hook-point-up position. Trimming the dubbing off this part of the fly will aid in counterbalancing the weight of the bent part of the hook by adding mass to the top of the finished fly and minimizing mass to the eventual bottom of the fly. The remaining long dubbing fibers will also keep the marabou “wing” of the Backstabber up and off the hook shank.
6. Select two marabou feathers from a strung clump. For the Backstabber carp fly I prefer marabou with long, fine feather fibers over one with short, fluffy fibers. Wet the first marabou feather and slick it back to form a slim shape. This enables you to see exactly how long the feather is and to have more control over it. Grasp the butt end of the feather between the thumb and ring finger of your non-tying hand and use the index and middle fingers of that same hand to straighten out the feather—which enables you to cut the feather to length with your free hand. You will not drop the end section (that you will be using) because it is secure. The usable piece of damp marabou should be about 3 inches (8 cm) long.
7. If you are tying on a rotary vise, rotate the vise so that the fly is hook point up. If not, remove the hook from the jaws, turn the fly over and re-clamp. Lay the prepared length of marabou off to the far side of the hook bend and tie it down right at the point where the dubbed body ends. The damp marabou should extend about 3/4 inch (19 mm) out past the bend of the hook, making the overall fly an inch and a half long.
8. Prepare the second piece of marabou in the same way you did the first. Lay this piece down on the near side of the hook bend. This insures there is an equal amount of marabou on either side of the hook, and that the hook can easily protrude through the marabou. Trim the butt ends of both pieces of marabou.
9. Select a feather from an India hen neck. Choose a feather that has fibers protruding out to about a ½ inch (13 mm) from the quill and straight fibers covering about an inch (25 mm) of the tip end of the feather. Prepare the soft hackle feather by cutting it to about an inch and a half (38 mm) long and stripping the butt end, leaving nothing but exposed quill. Be sure to leave a little bit of the fluffy webbing at the base of the feather—as this will add a bit more motion and liveliness to the finished fly. Tie the India hen feather down by the stripped quill. Be sure to have the cupped, or underside of the feather facing the rear of the fly—this allows the soft feather fibers to lie more easily back onto the body of the fly.
10. Wrap the soft hackle in place and tie off. Because the feather is short, it may only take three turns. Carefully trim the end of the feather with the tip of your scissors. Build a small thread head. End with a whip-finish knot and cut the thread. Apply a liberal amount of head cement to add durability to the fly.
This well done book provides tying instructions for over twenty essential carp patterns and includes variations of each pattern as well.
The Best Carp Flies is available through Amazon and your favorite carp friendly fly shop.
No comments:
Post a Comment