
We are going to start off the week with a series of posts in collaboration with J Wood Fly Fishing which will follow John Wood as he builds one of his fine wooden landing nets from start to finish. I am always interested in how something is made and it's neat to see inside the craftsman's process. This will be the first of four posts on this net build. At the end of the week we'll have a weekend giveaway and the net that you see built will end up in the hands of someone among the T.F.M. readership.
I would like to thank John Wood for taking the time to photograph his process and providing the narrative that is included as well.
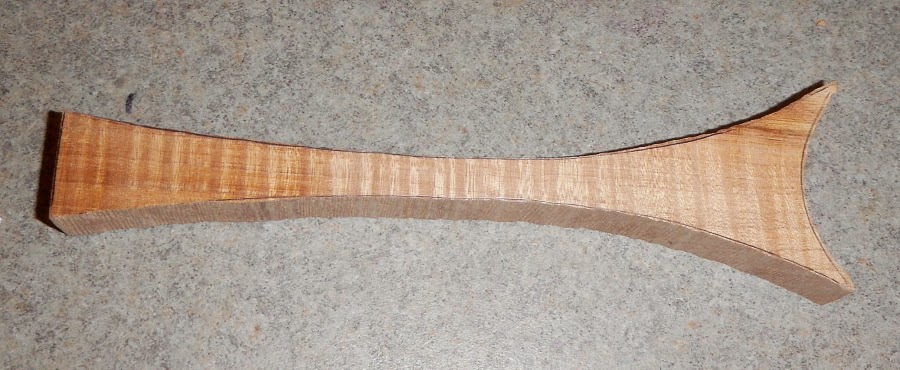
For me the appearance of a wooden net revolves around the wood selection of the handle. For this net I selected curly maple for its visual appeal, strength and weight. Rough cut right off the bandsaw it doesn’t look like much.
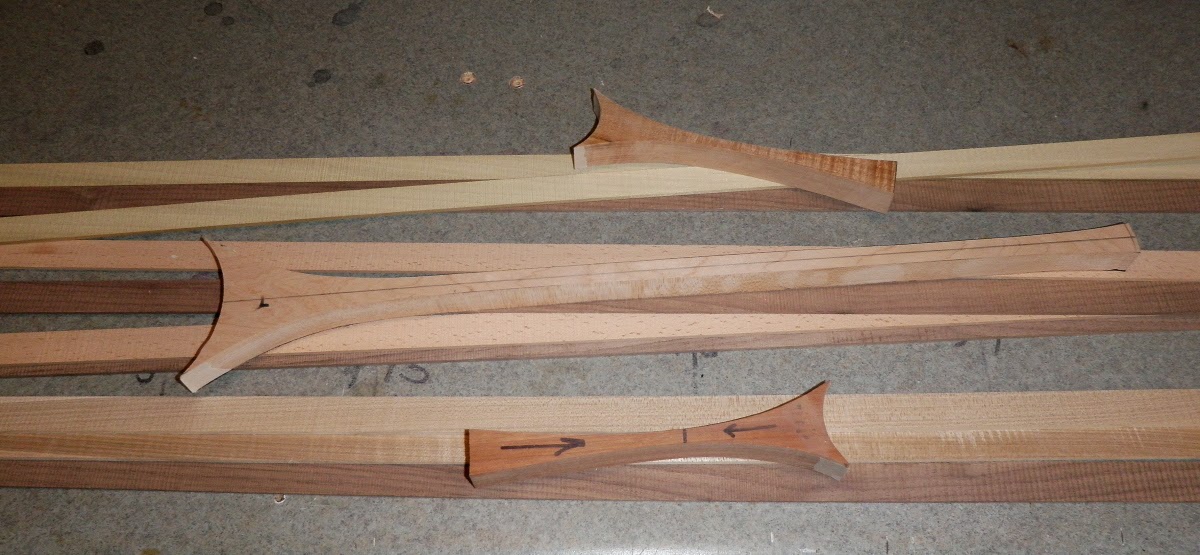
Once the handle is shaped and sanded a bit it begins to look like something of use. Along with rough cut lamination strips, right off the bandsaw, these are the components that will make up this net and a pair of others.

Shaving the lamination strips to final thickness and finish is done with a hand plane. Hand planing the lamination strips that make the frame hoop is time consuming and tedious. But the time spent doing this by hand allows me to inspect every inch of the lamination strips. This is where the craftsman makes or breaks the strength of the net hoop. Good solid laminations make for a strong, durable hoop.

After the lamination strips are prepared they are steamed and bent over a shaping jig. The bent lamination strips are clamped in place and left to set overnight.

After setting overnight on the shaping jig the strips are removed for one final inspection. The strips are snuggly clamped to the handle insert that will be used in the frame. They are checked for a tight fit before the gluing takes place.

The inner lamination strip is glued and firmly clamped in place then left to cure. This step gives a firm foundation for the two outer hoop strips to be applied to later. If there is any issue with the fit between the handle and inner hoop strip the net will be scrapped. The marrying of the handle and hoop is crucial to the durability and longevity of the finished net.

Once the inner strip is secured to the handle and inspected for fit the outer strips are glued in place. The strips are clamped in place using C-clamps. A caul is placed between the clamps and the outer surface of the net. This is done to protect the net and to ensure even clamping pressure along the length of the lamination strips. The clamps will be left in place until the adhesive has cured completely.
Check out the J Wood Fly Fishing website for more information. Follow the Facebook page for the latest shop news and the occasional giveaway as well.
I would like to thank John Wood for taking the time to photograph his process and providing the narrative that is included as well.
For me the appearance of a wooden net revolves around the wood selection of the handle. For this net I selected curly maple for its visual appeal, strength and weight. Rough cut right off the bandsaw it doesn’t look like much.
Once the handle is shaped and sanded a bit it begins to look like something of use. Along with rough cut lamination strips, right off the bandsaw, these are the components that will make up this net and a pair of others.
Shaving the lamination strips to final thickness and finish is done with a hand plane. Hand planing the lamination strips that make the frame hoop is time consuming and tedious. But the time spent doing this by hand allows me to inspect every inch of the lamination strips. This is where the craftsman makes or breaks the strength of the net hoop. Good solid laminations make for a strong, durable hoop.
After the lamination strips are prepared they are steamed and bent over a shaping jig. The bent lamination strips are clamped in place and left to set overnight.
After setting overnight on the shaping jig the strips are removed for one final inspection. The strips are snuggly clamped to the handle insert that will be used in the frame. They are checked for a tight fit before the gluing takes place.
The inner lamination strip is glued and firmly clamped in place then left to cure. This step gives a firm foundation for the two outer hoop strips to be applied to later. If there is any issue with the fit between the handle and inner hoop strip the net will be scrapped. The marrying of the handle and hoop is crucial to the durability and longevity of the finished net.
Once the inner strip is secured to the handle and inspected for fit the outer strips are glued in place. The strips are clamped in place using C-clamps. A caul is placed between the clamps and the outer surface of the net. This is done to protect the net and to ensure even clamping pressure along the length of the lamination strips. The clamps will be left in place until the adhesive has cured completely.
Check out the J Wood Fly Fishing website for more information. Follow the Facebook page for the latest shop news and the occasional giveaway as well.
3 comments:
Thats alot of clamps! Pretty cool
Excellent work, look forward to the next steps!!
Vasili...yep, it takes a lot to get it done.
Kevin...I figured you'd dig this short series of posts.
Post a Comment