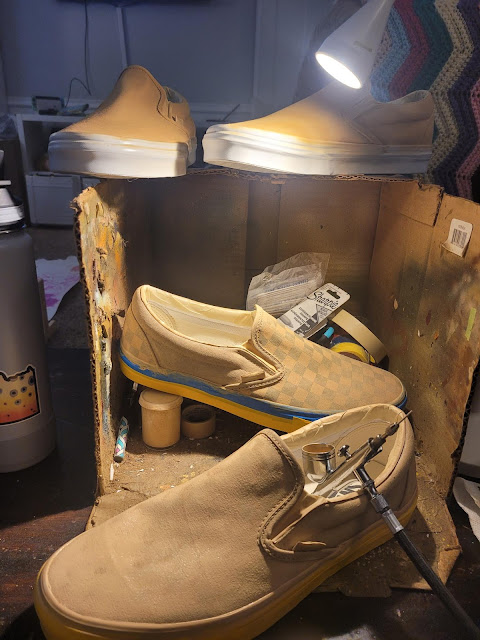
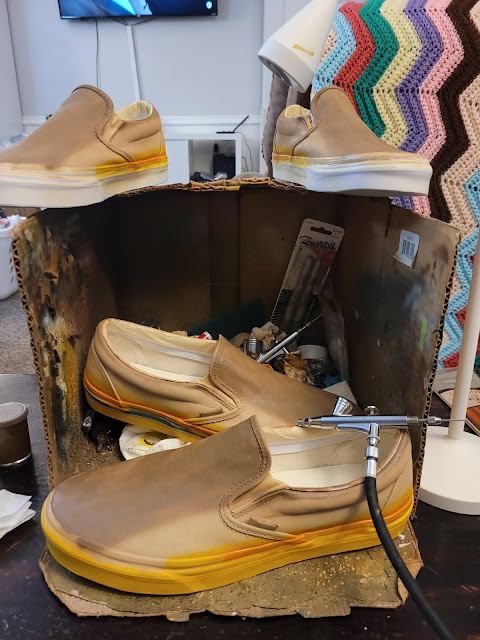
It's been awhile since I've shared the work of Wes Ashcraft of Wesashcraftie but when I heard that he was getting ready to paint up two pairs of Vans Slip-On shoes, I asked if he would chronicle the project with a series of photographs. He did so enjoy following along with the Wes's process. Look for Part 2 soon.
Wes wrote... "Here's the step by step of two pair of Van's Slip-On shoes that I did in brown trout art. I use
several types of paint designed to be used with footwear and the final
step is to spray the whole shoe with three
layers of clear paint, since it is waterproof and holds up really
well."
Prepping and taping is very important when I'm working on these Vans shoes projects. I usually cover anything I don't want painted with masking tape and then I use vinyl tape for the soles.
I lay down the first coat of paint using an airbrush and the type of paint that I use works best if you do multiple layers of thin coatings. You can use a heat gun to speed up the drying process and when I'm painting fabric the heat gun is required to set the paint so it doesn't bleed.
I try to line out several sets of shoes or items so that I don't have to change my paint out so much which ends up sort of like an assembly line. This cuts down on the time I have to clean out my brushes.
After several coats of paint, I end up with a smooth even base to work with.
Now it's time to start adding the layers of color changes to create depth.
And, after several layers of paint, the shoes gradually getting darker in color.
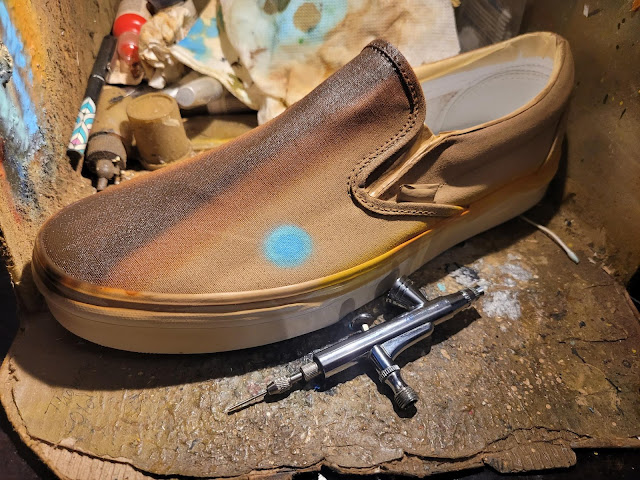
The final layer is the darkest. If I can work light to dark then I don't have to change out the paint in my brush as much and it's way easier to go from light to dark.
On this pair of shoes, the customer wanted a "blue cheek mark" so I did a multi-layer light blue cheek mark to add depth to the mark.
The joy of doing custom work is that I can fine tune a project around what the customer is looking for. In this case, one customer wanted a blue cheek mark and the other didn't. No problem at all either way.
At this point I've put away the air brush and I've started adding the base spots on the shoes. I like to use metallic gold and silver paint for the base layer of the black spots as they are usually the more dominant spots. I like how the metallic matches the sheen you get off of a brown trout as the sun shines on their scales. I also like to do smaller white spots that I will add red inner spots to to add depth and variety.
I start painting the inner spots that are smaller by using a tooth pick. Yup a tooth pick! I learned this trick from another painter to work on the finer detailed places and have found that I can control the paint much better.
I then move on to the bigger spots and use the butt end of paint brushes to create a smoother circular pattern. I get much better results than if I used the brush end. I use multiple ends depending on the size of the spots.
I finish the details by adding red spots inside the white with a tooth pic. Then I clean up the areas where I got some over spray. Finally, I then do several coats of a neutral color of paint that adds an extremely durable and waterproof coating of protection. It's super important for the paint to dry between coats.
Check out Wesashcraftie and follow along on Facebook and Instagram for the latest projects.


No comments:
Post a Comment